Wednesday, April 14, 2010

RECIPE FOR STICKLES (GLUE GLITTER)

I've just read this on a list and wanted to share - my only problem is I have no empty re-inker bottles to do it with!!

Mix crystal effects and dazzling diamonds and make your own stickles.
You can make colored stickles too by adding a couple drops of the ink. Talk about co-ordinating embellishments!!

Monday, February 22, 2010

INSPIRING DEMO STORY

(From our Demo Website)
Best, Fastest Way to Get Results

February 22, 2010

We've been focusing on the power of the workshop to strengthen and build your business, and several of you have shared your success stories with us. Recently Catherine Pooler, a demonstrator who has served on the Stampin' Up! Advisory Board and earned recognition as a top ten Demonstrator of the Year, told us the following:

When I started this business six and a half years ago, it was to get some free Stampin' Up! goodies. Within a couple weeks, though, I realized that it was a viable business opportunity that would allow me to work from home, go out on the weekends and evenings a few times a month, and not have to put my kids in day care. In less than six months, I was making more money than my previous job as a teacher.

And I did this doing workshops.

I have been successful with Stampin' Up! beginning with my first year, and my success came from doing four to eight workshops each month. About two and a half years ago, it became harder to book workshops, and when I did have a workshop, the sales were low. So I stopped asking for bookings. I was lucky to do one or two a month. I relied on my current customer base and my clubs. As a result, I saw my sales, club membership, and recruiting plummet, followed by my enthusiasm.

This past July, I booked five workshops! Wow! I hadn't had more than two workshops in a month in more than a year. And July? July is usually a light month. My enthusiasm went through the roof! I was excited!

And guess what followed? More bookings. More sales. New club members. I'm having my best January yet--and it's mostly from workshops.

Workshops work--and they're easy! When I am preparing for ONE workshop, I am preparing for all of them for the month. I design a few different projects, cut a bunch of card stock for all of them, and keep everything on a shelf for easy access. When it's time to go, I grab a couple boxes, make sure my catalogue bag is stocked, and I'm gone! A few hours of work, a whole lot of fun introducing people to what I love, great sales, new bookings and club members--that's what you get from workshops. (Don't get me wrong, they don't ALL turn out great, but most do!)

Sometimes we feel like we have to have a strong Internet presence to compete in today's world. Although I have a blog, the blog isn't essential to my success at all. Reaching out to people in our neighborhoods, our friends, our families and asking them to stamp with us--that is what will make us successful.

Picture this: A demonstrator gets her Starter Kit, has an open house two weeks later, gets sales and couple of bookings. She's off! She can do several workshops using the contents from her Starter Kit, along with a little ribbon and card stock, plus a punch or two.

Another demonstrator gets her kit, works to get her web site up and running, posts every day with traffic gradually increasing, hoping to get sales. In the meantime she's had to purchase almost everything in the catalogue to show new things all the time, and she's worked just about every day.

My blog is an addition to my current business, which I'm basing on the workshop model. That's the best and fastest way to get results!

Thursday, February 18, 2010

YOUR "30 SECOND ELEVATOR SPEECH"

Hi Ladies:

If you've ever been asked what you do and you're not quite sure how to explain it, here's one suggestion:

"I'm the owner of ___________, a rubber stamping and scrapbooking business. Did you know that scrapbooking is the #1 craft-related hobby in North America with over $2.7 billion dollars spent on supplies last year - up from the year before!

I work with people who are interested in this hobby to help them create handmade scrapbooks, cards, invitations and more. And, for people who would like to start their own paper crafts business, either as a full-time endeavour or as a way to gain a little financial security, I help them get established and grow."

From John Sanpietro

Tuesday, February 16, 2010

DIRECTIONS FOR EASY A2 CARD BOX

A2 (CARD SIZE) BOX


 One 7 3/4" x 9" piece of cardstock for your box base

 One 6 7/8" x 8 1/8" piece of cardstock for your lid

 Scor-Pal™ or other scoring tool

 Scor-Tape™ or other strong adhesvie

 Scissors

 Stamps

 Ink

 Ribbon

 Additional cardstock and embellishments to decorate your box if you wish.

Step-by-Step

1. Step 1

Score your 7 3/4" x 9" piece of cardstock at 1 1/2" on each side.


2. Step 2

On the long sides of the cardstock, cut the score lines up to the point where they connect with the score lines from the short side.


3. Step 3

Prefold all your score lines.


4. Step 4

Apply Scor-Tape™ to each of the four outside corners. These are your glue tabs.


5. Step 5

Peel off the paper lining of the Scor-Tape™ and fold in the glue tabs to create the bottom of your box.


6. Step 6

Stamp your 6 7/8" x 8 1/8" piece of cardstock if needed.


7. Step 7

Scor the cardstock at 1".


8. Repeat scoring the cardstock piece at 1" on each side.


9. Step 8

As in step 2, cut the scor lines of the long side to the point where they connect with the score lines of the short side.


10. Step 9 (Optional)

Punch each side with your Scallop Edge Punch. No need to punch the glue tabs.


11. Step 10

Cut down your glue tabs so they won't show under the scallops. Add Score-Tape™ to each of the four corners.


12. Step 11

Prefold your score lines. Peel off your paper liner of the tape and fold the glue tabs in to finish the lid of the box.


13. Step 12 (Optional)

Add more color and depth by sponging the edges of your lid.


14. Step 13

Fill your box with either matching cards or other goodies.

Wednesday, February 10, 2010

NOTES FROM LEADERSHIP: MOTIVATING INVESTMENT

OK, I want to make macaroni and cheese (i.e. Kraft Dinner), what do I need?
Noodles - yes
Cheese - yes
Milk - yes
Stove - yes
And ... oh yes, a pot with water.
This is a recipe that guarantees results because millions of people have made it.

Monroe's Motivated Sequence (MMS) is a guaranteed result because millions of people use it (you can identify it in almost every commercial), and we can use it in our Stampin' Up! business, with workshop bookings, hostess training, and recruiting new demos.

The five points in MMS
1. Get the person's attention
2. Identify/develop a need or problem
3. Satisfaction - the product will solve the need.
4.Visualization - (the most important point) picture overcoming the problem and the benefits from it.
5. Call to Action - Ask

How does this fit with SU?
Bookings:
1. Attention - Show what we can create with paper - easy to do in a workshop or class, outside of these we can send cards, use accessories to open a conversation (rag purse, fabric flowers, logo wear, car decals, volunteer card making services, distribute catalogues)
2. Need. There is a set of needs that we will always have that are identified by the Relational Dialectics Theory:
- Need a connection to others
- Need novelty for interest
- Need to share
Stampin' Up! workshops and classes fufil all these needs.
3. Satisfaction - Stampers and Scrappers have fun when they get together, they try new things, and share what they have made
4. Visualization - Tell them how your classes work so they can imagine themselves there. Show them samples so they can imagine themselves making them.
5. Invite them to a class or other event.

With Hostess Coaching:
1. Attention - Tell her about the exclusive products and free merchandise that only hostesses can obtain.
2. Need - To feel comfortable about hosting the workshop, to find enough people to attend, to earn what she wants.
3. Satisfaction - Help her to relax - "I'll help you find people", "Don't worry about your house, I'll make sure we'll have lots of fun."
4. Visualization - A successful workshop. We can help hostesses have a succesful workshop without a hard sell. Say something like "In the past I've had hostesses tell guests - you don't have to buy anything - but that doesn't result in a good workshop for you. You don't have to talk about buying things, just tell them it will be fun - I'll make sure everyone has a great time and are glad they came."
5. Invite/Ask - Invite the hostess to get excited about the workshop, and the products, and get her involved. "Show your friends some of the things you've made (if she has), tell them how much you enjoyed the workshop you attended."

Recruiting:
1. Attention - Listen for those who say "I wish I had some exta money to get all the stuff I want". Consider your good customers - although you will lose them as a customer, you can still retain them in your classes etc. Plus someone else might ask them to sign up first, and that would be a bigger loss.
2. Needs - Money, product, connection with others, achievement.
3. Satisfaction - "I'll help you learn how to make money and run your business. We'll get together to learn new techniques and share ideas."
4. Visualization - "You'll be able to create your own stamping room." "You'll be able to help your daughter create her own wedding invitations and table favours".
5. Ask/Invite - "Now is a good time to sign up because it's: Sale-A-Bration, just before Christmas, easier to travel to workshops because it's spring/summer." etc.

Be proud that you have your own business, be proud that you have ideas and methods to make it successful.

Winged Spring

This is a class that both Linda and I found independently of each other, and both love. I'm offering it this month (February) and Linda is offering it in March. It's from a ten week class from Jackie Topa
I love the little picket fence holder (I use the white backing from the DSP papers to make the holder as it's stronger than plain paper.)

And here's a photo of the four cards:
Jackie uses the Extra Large Two Step Bird punch and the Eggcellent Eggs Kit to make these, and it's easy and a lot of fun. For instance - the pink petals on the top card are made with the 'wing' on the Bird punch. The little flowers on the yellow card, and the borders on all are from the sheets in the Eggcellent Eggs kit.

Friday, January 29, 2010

BABY SOCK ROSES

These are oh so adorable!! Can't wait for someone to get pregnant!!!


Pam Morgan says they are really easy to make and I will give them a try, but in the meantime here is what she did:

Use one baby sock for each rose. Open it completely out:


Start rolling from the toe, allowing the 'toe part' to stay slightly above the rest of the roll.


I'm not sure what she is doing here but I know she had to stick a florist wire into the sock for a stem.


And then she wrapped the bottom of the 'rose' and the stem with florist tape. You can add leaves
as you wrap the stem if you wish.

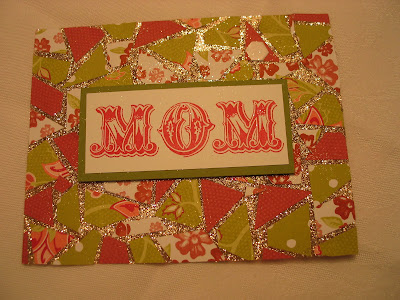
GLITTER WOW TECHNIQUE

This is the technique I had a sample of at our first meeting. (Caution - bad photos below!!)
 I used sticky paper, but Linda says that the wide scor-pal tape is excellent too (and probably much cheaper!) It's just the right size for cards as well. Remember you can run the papers over the edge and trim afterwards.

Here are the samples from Leadership. She did a couple in a randam design like mine, and then she also did some using the paper like small tiles. Really beautiful in real life!


Here she used red glitter


BAD PHOTOS OF BORDER PUNCH FLOWER TECHNIQUE

These are photos from leadership, taken from the 'large screen'. My camera and I never did get the hang of it, but you guys are so quick that I know you'll get the idea easily.

The Demo (Pam Morgan I think) started with an 8 inch punched border using the eyelet border punch. Run the strip through a crimper. Punch a 1 3/4 inch circle and then cover one side with sticky tape - Tombo would work too. Starting on the outside edge of the circle, run the border around gathering the paper at the base to easily form a circle. See photo:


Make two or three layers of border circles, add more to cover center if necessary.


Glue a button or other embellishment in the centre, add leaves by tucking into flower layers.


Here's a sample used on a card:


More samples. Very easy to do!

Thursday, January 28, 2010

CLOUD COMPUTING

One of the latest ways (and biggest trends) of storing your (not too personal) information is to work 'in the cloud', known as Cloud Computing. This just means that you are storing your information on-line so that you can access it from wherever you happen to be, it's not necessary to have your own computer. (Sort of like our group blog - accessible whenever I give you the correct address!!)
Here is a free site recommended by John Sanpietro where you can store information, have 'to-do' lists, etc.
Just for your information, in case you might be interested:
http://www.evernote.com/

Wednesday, January 27, 2010

FOUR FOUNDATION SYSTEMS NECESSARY FOR BUSINESS SUCCESS

Taken from John Sanpietro's "Two Week Tune-Up" to start the new year.

It's easy to make money with Stampin' Up!, the cost to start and run the business is low, and if you follow good business practices you can be successful. Too many demos spend all their profit on SU products!

1. CUSTOMER MANAGEMENT SYSTEM
This business is customer driven and if you are not running your business efficiently you are leaving piles of money on the table.
You need individual records on customers and prospects, with space for notes including: Birthday, Spouse's name, kids' names, interests, record of phone calls, future calls, and tasks. (Recommends Microsoft Outlook not Outlook Express)
It's recommended that you call each of your customers every 90 days. Once you have called, put it on your schedule to call them again in 90 days.
A good system allows you to seem a much better business person than you are. Don't bring new customers into a flawed system.

Comment: I don't want to seem like a pest?
John's response - call 90 days apart, 2 emails a month (one a newsletter)
If you get no response keep them on your calling list until they ask you to take them off.
A good Customer Management Program will make you money. Update information while you are on the phone with the customer.

Comment: No one answers, do we leave a message?

Response: 1st call, leave message: Hi this is ________ from Stampin' Up!. Sorry I missed you, I'll call back on ____________ (two business days later). If you want to call me my number is __________

2nd call,  leave message: Hi this is ________ from Stampin' Up!. Sorry I missed you, I'll call back on ____________ (two business days later). If you want to call me my number is __________

3rd call,  leave message: Hi this is ________ from Stampin' Up!. Sorry I missed you. If you want to contact me my number is ____________
Schedule to call again in 90 days.

2. TIME MANAGEMENT SYSTEM

You need to have a set schedule the same as if you were working at an office. How many hours per week will you committ to your business? What hours per day? Write down a schedule. Start on time, end on time. Take no personal phone calls, no errands, no Internet surfing.

Consistency is the #1 most important thing - your business will gain momentum

Start filling your calendar - plan an event/class/club, write the date on the calendar. Work backwards and decide when you will need to put it on your blog, prepare a blurb for your newsletter, make phone calls.
Each month list your monthly tasks and when you will do them: for example - when will you send out your newsletters? (Tuesdays and Wednesdays are best, according to studies) When do you need to prepare it so that it's ready to send.
Each week list your weekly tasks and when you will do them; for example - update your blog
Each day make your to-do list: phone calls, marketing, etc.
You need routine and structure to make your business work. Slow and steady does win the race.

3. FINANCIAL MANAGEMENT SYSTEM
You should know your MARKET, your COMPETITION, your NUMBERS. What are your year to date sales? How much have you sold this quarter? How much left to make your minimum? How much profit/loss?

This is actually the easiest system - 3 minutes per day. You must record how much you made and how much you spent.
There are only 6 ways to make money with Stampin' Up!
1. Instant Income
2. Volume Rebate
3. Downline Commissions
4. Classes, Clubs
5. Sale of Finished Product
6. Sale of Retired Product

Probably 600 ways to spend it, but use the most obvious:
1. Stamping Supplies
2. Office Supplies
3. Postage/Phone
4. Internet/Blog/Constant Contact
5. Memberships/Training

Use Quicken if you have it, or a regular spread sheet to enter your daily numbers. (Use a notebook if you prefer, just keep the records!)

Once you see where money is coming from you can adjust - do more of the money making things, do less of the ones that aren't as popular.

Don't try to backtrack to fill in your numbers, just start TODAY.

All three of these systems are necessary for a good business, BUT none of it matters if you don't have customers, so:

4. MARKETING SYSTEM
The first thing you must do is build your mailing list/customer list, and you must keep adding to it. Recommended to add 20 new names every month. Customers have a shelf life, eventually they become less active...not as interested...fade away.

The average demo lasts 1 -2 years if she doesn't continue to expand her list.

Marketing is straight forward - It Must Be Consistent
Everyday you should be doing some type of marketing - preparing newsletter, researching target markets, blogging about classes, phone calls about workshops, classes, did you receive your order, etc.
For example: Say you're having 10 events per month including workshops, classes, etc. You plan for four different pieces of marketing for each - phone, newsletter, blog, poster. That is 40 separate pieces of marketing you have to do - schedule it on your calendar.

Blogging everyday increases traffic.

Phone Calls - nothing replaces them, everyone who makes phone calls walks away with sales and bookings.

The more phone calls you make, the more people you ask, the more blogs you post, the more of anything gives you a better chance of succeeding. You have to work the numbers game. 10 % of 10 is one. 10 % of 50 is 5. The more contacts you make, the greater number of positive responses.

Gift Ideas and samples using the Eggcellent Eggs Kit

This is a journal that Michelle Tech (http://www.2stampis2b.com/) decorated and gave to her friends at Leadership. I sat with her and Mary Fish (http://www.stampinpretty.com/) Yes - I was thrilled! Michelle let me take photos:


I'm afraid I forgot who made this one, but I love it:
 

Now here are some things that Patty Bennet made with the Eggcellent Eggs Kit and other things from the Occasions Mini:


Photos of Momento Mall

Well - I had heard so much about "Momento Mall" before I went that I thought I might have to rob a bank before I came home (so I could afford to come home!) But it wasn't too bad. At least the banks were safe!

Of course there was a line-up the first day... The lady under the sign was coming out and we were all oohing and ahing over her Sweet Pea bags.


Outside the window....


Inside at last! It doesn't look busy inside because I was lucky to be pretty close to the front of the line and most everybody was behind me!


People were filling their baskets...


I didn't really go for the towels and flip flops,
but the little buckets of red things are another story - I'll tell you below.
If you look closely at the Leis around the maniquens neck you will see
they are made from Designer Series paper, punched with the 5 Star punch
and curled. They are alternated on the cord so that the curls give them more bulk.
The black and white bag is the Leadership Bag that everyone got, and I forgot to show you two!!


Great Advertising!


But I knew Brian would never go for it (plus we have a wiper on our back window)
So I got the small one for the side window. Don't you love the rub-ons!
Don't know if they would work on our salted winter highways!


I thought I took more photos but I guess I concentrated on shopping instead!
I did get one of those black sweaters in the window (forgot to show you that too!) The flowers
are made with our wide striped ribbon.
This is a close-up of the card tree in the window so that I would remember
the cards:


And about those little red things lanquishing in their buckets...
they were spritzers of hand sanitizers with 'Stampin' Up! on them, priced at $2.49 each.
Now we all thought - Blah, got that stuff already to travel here with - don't need any more....
Then the last day of the conference there was a demonstration on stage about using
the shimmer paint in alcohol to spritz on cards to give them shine... and oh, by the way,
that's 70% alcohol in the hand sanitizers in Momento Mall...
Well I went downstairs to get some right after the demo was over, BUT the smart people didn't wait!
They were coming upstairs with bags of 20 and 50 vials of them, and when I got there
they were ALL GONE.
Until then they could hardly give them away.
Oh well, I was only going to get one for each of us....sorry....

Tuesday, January 26, 2010

Fabric Ideas for the Big Shot

I found this really inspiring because I had never considered using the Big Shot for cutting material before. So Linda - you will probably be able to recognize the shapes and uses better than I, so enjoy!

The first photo is of a purse made by a demo I met in the line-up waiting to get into our first session. Not as nice as yours Linda!!


I was blown away by these quilts!


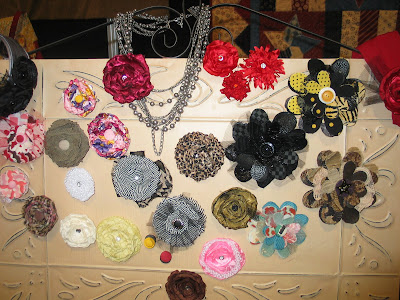
Fabric Flowers made from our dies:


And worn on hats, jackets, purses, dresses!


This is a wrist flower that Shelli wore during one of her presentations, it's made with some type of white material and tulle cut with our circle dies and embellished with our pearls. They are attached to a ribbon which ties around her wrist:


This is a photo of a photo of a gorgeous fabric necklace that they had made (click on it to enlarge):


More photos tomorrow!

Photos of Board Displays at Leadership

Among the many benefits of attending a Leadership Conference or Regional Conference are all the ideas you glean from seeing other Demos' creations. Here are photos of some of the dozens (maybe hundreds!) of cards on display. If you double click on the image it should bring it up larger. Most of the boards were themed. These first ones are Vintage Vogue:


This next set is a new one called Sweet Scoops coming out in the Summer mini:


This one uses a variety of sets:


There's more to come!

WELCOME TO OUR CYBER HOME!

OK Ladies - Here's a spot where I will upload info and photos to share so that we don't have to store everything on our own computers. I'm going to start with the photos from our first meeting, and then info from Leadership. Hope you like it!

Saturday, February 23, 2010 - First Quarterly Meeting of the Atlantic Stampers Ink.
Schedule:
9:30    Arrival
10:00  Show & Tell (We'll share what we've been making, doing, plan to make or do - bring samples if you have them) We'll also do our card front swap then.
10:30  Meeting and sharing with Allison Stuart. Technique - brayered sky (only we like the sponges better!)
Noon  Lunch
1:00    Information from Leadership Convention
1:30    Make & Takes
2:30    Presentations & Awards - Maree's bracelet and charm for promoting to Senior Associate.
3:00   Relax and chat, decide on a team name, evaluate day, decide what type of future activities we will do.